A clean vape device is easier to inspect, handle, and maintain. This guide explains how to clean a vape device safely, using practical steps that reduce the chance of damaging its parts. You will learn how to prepare the device, clean removable components, and let everything dry before reassembly. Small steps matter. A soft cloth, warm water, and a clean, dry workspace are often enough for compatible parts. Never rush.
Before cleaning, switch the device off and disconnect it from its charger. Remove batteries only if the manufacturer’s instructions allow it. Keep liquid away from batteries, charging ports, buttons, and other electronic components. Wash a detachable tank or mouthpiece only when the device maker permits it, then dry each part completely. Coils and other consumable components may need replacement rather than washing. Check the manual. If you notice cracks, corrosion, unusual heat, or persistent leakage, stop using the device and seek manufacturer guidance. These tips support basic device care; they do not make vaping risk-free. Some residue can be stubborn, and forcing a tight part may cause damage. Patience helps. The following tips focus on careful handling, sensible cleaning, and recognizing when a component should not be reused.
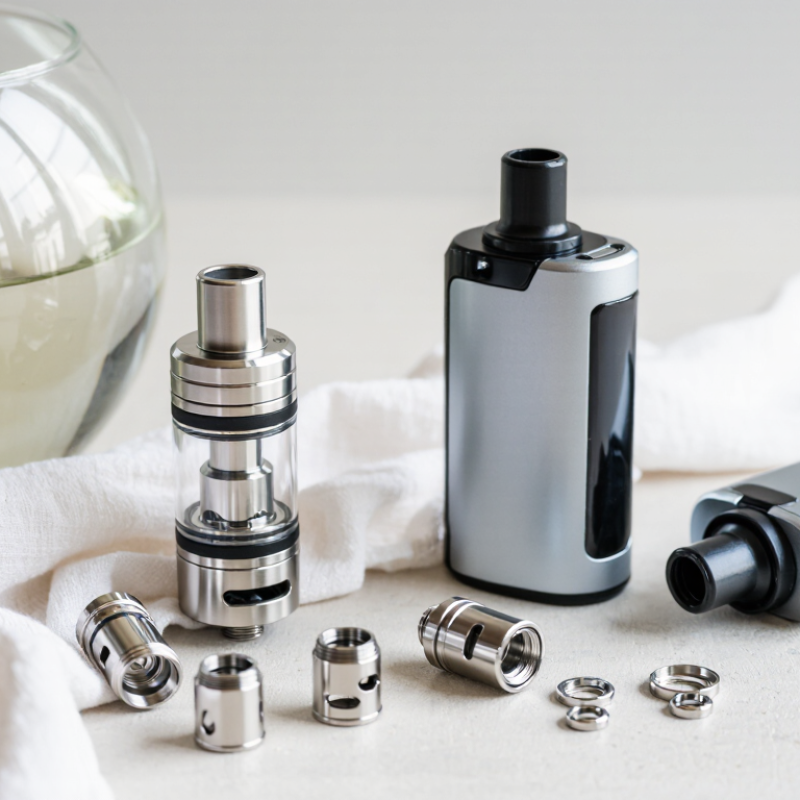
Before cleaning, identify what your device actually contains. A typical setup may include a mouthpiece, pod or tank, coil, battery, buttons, and charging port. Parts differ, so do not assume a familiar-looking device comes apart the same way. Check the manufacturer’s manual for disassembly steps and approved cleaning methods. Small parts matter.
Turn the device off and let it cool before handling it. Remove only the components the manual says are removable. If it permits rinsing a tank or mouthpiece, use plain water and let each part dry completely on a clean towel. Never immerse the battery section, controls, or charging port. A little moisture in the wrong place can cause damage.
Use a dry, soft cloth around the exterior and keep liquid away from openings. Avoid sharp tools, household cleaners, and force when loosening stuck parts; these can scratch surfaces or harm seals. I used to think every removable piece could be washed, but that assumption is unreliable. If guidance is unclear, pause and check the device instructions rather than experimenting.
Before reassembly, inspect seals and threads for residue, wear, or moisture.
Before cleaning, switch the vape device off and unplug it from any charger. A dark screen does not always mean the device is fully powered down, so check its controls and instructions. Let it cool on a stable surface if it has been used recently. Warm parts can be uncomfortable to handle, and rushing makes small components easier to drop.
Choose a dry, well-lit work area, such as a cleared table with a clean cloth underneath. Keep drinks, sinks, and damp towels away from the device. A little moisture can reach charging ports or other openings. Keep pets and children at a distance, too. Small parts are easy to lose. If the device has a removable battery, take it out only when the manufacturer’s instructions say it is safe; never force open a sealed unit. I might be tempted to start wiping right away, but pausing to check the manual is the safer choice. It feels like an extra step. It matters. Keep the device switched off throughout cleaning, and do not reconnect it until all parts are completely dry.
Checklist actions by preparation stage. Counts represent the items listed below, not measured safety scores.
Power down: Switch off the device and disconnect its charging cable. Prepare the area: Choose a clean, dry surface and let the device cool before cleaning. Keep liquids away from the battery and electronic components, and follow the device instructions.
Before cleaning, switch the device off and let it cool completely. Check its manual to see which parts are designed to come off. A mouthpiece or tank may detach easily, while battery sections and internal connectors usually should stay untouched. Never twist a stuck part with pliers or pull hard on a cable. Stop if you feel resistance.
Small parts can be slippery. Work over a clean towel, and place each piece where it cannot roll away. Remove the mouthpiece and other clearly detachable components using a gentle, steady motion. If a seal or connector shifts, pause and check how the parts fit together rather than forcing them back. Use a lightly damp cloth on suitable exterior surfaces; keep moisture away from ports, electrical contacts, and the battery area. No soaking.
Let cleaned parts air-dry fully before reassembly. Even a small amount of trapped moisture can cause problems. Check for torn seals, cracked plastic, or bent contacts, and do not use damaged components. I might be tempted to rush this step, especially when a part looks dry, but hidden moisture is easy to miss. If the manual is unclear or a connection will not release smoothly, leave it assembled and seek qualified guidance.
Clean the Mouthpiece, Tank, and Contacts With Suitable Materials
Turn the device off and disconnect it from its charger before cleaning. Let warm parts cool, then separate the mouthpiece and tank according to the device instructions. A little patience helps. Rushing can leave moisture where it does not belong.
Wash a removable mouthpiece in warm water with a small amount of mild, unscented soap. Rinse it well and let it air-dry completely on a clean towel. For the tank, check the manual before rinsing; some parts should not be submerged. Keep water away from the coil and any built-in electronics. If residue remains, use a soft cloth or cotton swab, not a sharp tool.
Wipe electrical contacts gently with a dry, lint-free cloth or swab. Do not pour cleaner onto them, and avoid abrasive materials that could scratch the metal. Wait until every cleaned part is fully dry before reassembling or charging the device. This can take longer than expected. If contacts look corroded, or liquid has entered the housing, stop using the device and seek qualified service rather than probing inside. Cleaning is not a cure for worn or damaged parts.
| No. | Area | Suitable Materials | Cleaning Tip | Safety Note |
|---|---|---|---|---|
| 1 | Device preparation | Clean, dry work surface; soft cloth | Turn the device off, let it cool, and separate removable parts before cleaning. | Follow the device manual. Do not clean a hot device or handle it while it is charging. |
| 2 | Battery and main body | Dry, lint-free cloth | Wipe the exterior gently to remove dust, fingerprints, or residue. | Never immerse the battery or electronic body in water, and keep liquid away from openings. |
| 3 | Mouthpiece | Warm water and mild dish soap | If the mouthpiece is removable and its manual permits washing, wash it, rinse thoroughly, and dry it completely. | Do not use boiling water or abrasive cleaners; check that the material is water-safe. |
| 4 | Tank or pod reservoir | Warm water; soft, lint-free cloth | Empty and disassemble the washable reservoir, then rinse it according to the manufacturer’s instructions. | Keep water away from the coil, battery, and electronic parts unless the manual specifically says otherwise. |
| 5 | Tank threads | Dry cotton swab or lint-free cloth | Wipe liquid residue from the threads and grooves without forcing material into the device. | Avoid metal tools that could scratch surfaces or damage electrical connections. |
| 6 | Electrical contacts | Dry cotton swab | Gently remove visible condensation or residue from accessible contacts. | Do not pour liquid onto contacts or scrape them. Make sure the area is dry before reassembly. |
| 7 | Coil or heating element | Replacement coil, if needed | Replace a worn or contaminated coil rather than washing it, unless the manufacturer gives specific cleaning instructions. | A wet coil may not work properly. Do not install or use one until it is completely dry, when washing is permitted. |
| 8 | Airflow openings | Dry cotton swab or soft brush | Carefully clear accessible dust or residue from airflow openings. | Do not push debris deeper into the device or insert sharp objects into narrow openings. |
| 9 | Cleaning products | Water and mild soap for washable parts; dry cloth for electronics | Use only materials appropriate for each part and compatible with the device’s instructions. | Avoid bleach, household sprays, and unapproved solvents, which can damage materials or leave unwanted residue. |
| 10 | Drying and reassembly | Clean, dry cloth; air-drying time | Let every washed part air-dry fully, then reassemble the device and check that parts fit correctly. | Do not charge or use the device while any part or contact is damp. |
After cleaning, leave each removable part on a clean, dry towel. Keep the battery and charging port away from water. Use a dry cotton swab to reach the narrow corners, then let parts air-dry until no moisture remains. Don’t rush this step. A damp connection can cause unreliable operation. I’ve found it easy to mistake a surface that feels dry for one that is dry inside; waiting longer is the safer choice. Follow the device’s care instructions, and never reassemble it while parts are wet.
The U.S. Fire Administration’s 2017 report recorded 195 e-cigarette fire and explosion incidents in the United States from 2009 to 2016. Those incidents do not show that cleaning caused fires, but they underline the need for careful battery handling.
Reassemble only after checking for trapped droplets, lint, cracks, or a loose seal. Make sure the parts fit without force. Then operate the device briefly in a clear, well-ventilated space, watching for leaks, unusual heat, or a burnt smell. Stop if anything seems wrong. Don’t charge or use a device with a damaged battery, wet port, or persistent fault; seek qualified repair advice instead.
Switch the device off, disconnect its charger, and let it cool. Remove only parts the manual identifies as detachable. Stop if anything resists.
Work over a clean towel and place each piece where it cannot roll away. Small parts get slippery.
Wash it in warm water with a little mild, unscented soap. Rinse well, then air-dry it completely on a clean towel.
Check the manual first; some tanks should not be submerged. Keep water away from coils and built-in electronics. No soaking.
Gently wipe them with a dry, lint-free cloth or swab. Avoid liquids, sharp tools, and abrasive materials.
Wait until every part is fully dry, including narrow corners. I sometimes want to rush this step, but hidden moisture is easy to miss.
Look for droplets, lint, cracks, torn seals, and bent contacts. Parts should fit without force. Stop if a seal or connector seems shifted.
Do not use or charge it if the battery is damaged, the port is wet, or a fault persists. Seek qualified repair advice.
Learning how to clean a vape device safely starts with understanding its parts and following the manufacturer’s cleaning guidance. Before beginning, switch the device off, disconnect it from any charger, and set up a clean, dry work area. Remove only components designed to come apart, and never force a connection or open the battery housing. If a part is damaged or you are unsure how to remove it, leave it in place and consult the device instructions.
Clean the mouthpiece and tank with suitable materials, such as a soft, lint-free cloth or warm water when the instructions allow. Keep liquid away from electronic parts, and gently wipe the contacts without scraping or soaking them. Let every cleaned component air-dry completely before reassembly; moisture can affect operation. Once assembled, check that the parts fit securely and that the device appears undamaged before use.
Onics Vape